Showing posts with label craft fair. Show all posts

Sunday, November 8, 2015

Craft Show Wrap Up

Yesterday was the holiday bazaar/craft show in which I participated. It was well-attended, and I sold some stuff. Yeah! It was pretty cool, too! I have mentioned in previous posts that I have very little confidence and experience with sales and marketing; consequently, I was feeling quite unsure of myself in this venture. As it turns out I did a pretty good job of having ample merchandise; I went into the day with a positive attitude; all in all, I had a fun day.

My space was first inside the door, so I greeted visitors as they entered. That was fun as I saw lots of folks I knew and hadn't seen lately. It's always nice to visit.

I sold all the kitchen towels there on the corner of the table. I sold several of the fabric post cards. From about a year and a half ago I had a couple dozen chap stick holders, so I put those out and sold every single one of them. That surprised me. A few of the mug mats sold, but I expected they'd go better.

It's just really hard to know what is going to sell. No quilts, but I had some definite interest. Those people took my card, so maybe there will be a sale in the future. None of the pillows sold, which I 'd sorta' thought they would appeal.

Now that the bazaar is over, I will direct my attention to the t-shirt quilt I need to be finishing. It will hopefully go to the quilter on Tuesday.

This next week will have some fun sewing days. On Tuesday, Terry is having the girls in for a day of stitching and on Wednesday, we have our annual Veterans' Day sewing at Sherrie's. FUN!! I would love to start a new project, and I have several options swirling around in my head. Stay tuned.

Happy Quilting, Friends!

Wednesday, June 11, 2014

Craft Fair Signage

I told you about the tags I made for the craft fair. Today I will show you a couple of ways I changed those tags slightly to add interest.

 I used a variety of plate stands and memo holders to post signs.

 Again, if I hadn't waited until the last minute to do this task, I would have had neater penmanship. This is what a rush job looks like.

 I had this cigar box given to me by a good friend. It was in my jewelry drawer, but I didn't really keep anything of importance in it. So I gave it a new job.


I'd made a bunch of chap stick holders, and put them in the cigar box. I took a small frame and used the faded book page as a background. I used a dry-erase marker to write the price on the glass. Worked pretty well. I leaned the frame in the lid of the cigar box.

And finally, I used clothespins to attach tags. I used the faded book pages on stiff card stock again, and just attached the sign to the antique lunch box.

Still on vacation, Peeps!

Happy Quilting, Friends!

Tuesday, June 10, 2014

A Little Craft Fair Follow Up

You all know from my recent posts that I participated as a vendor in a craft fair. It was my first time, and I wanted to make a good impression. I spent hours sewing items to include in my booth. I also spent a good amount of time on Pinterest looking at craft booths gathering ideas and inspiration. Here is one idea that I used, and I think it turned out well.

Tagging items with attractive, clear tags is important in a vendor's presentation. I put this task off until the very last minute, but what I came up with really made me happy.


I've saved this old dictionary because I knew that I could do something with it, and tags presented the perfect idea. I have lots of craft ideas logged on Pinterest, and often faded pages of old books are used, so I kept this around for just such a purpose.


I removed a random page. One page yielded four tags, but I suppose you could make them any size you want; I just cut mine to suit me. There are no rules here, you know.


I took two 4"x 6" note cards to provide weight.


Other supplies needed are shown here: cutter to use on paper (my paper cutter has paper wrapped around the handle to identify it), glue stick, hole punch and yarn. I suppose I should include that a ruler is needed, but you probably would have figured that out, right?

I glued the note cards face down onto the book page. I trimmed  up with the rotary cutter and ruler. I popped a hole in the corner and threaded about 6-8" of yard through and looped a knot in the ends.


I could fit 2 note cards on the pages from this book; that is what you see above.


After cutting to the size I wanted, I just free-handed my item and price onto the tag. Had I not waited until the last minute to do these tags, I would have used a more suitable marker, and taken a bit more time with my lettering. 

Hope you find this helpful. I swear by using Pinterest for inspiration. It motivates me - a lot.

Happy Quilting, Friends!


Saturday, June 7, 2014

Craft Fair

Well, I did it. I participated as a vendor in a craft fair. While I didn't become independently wealthy, I did gain a lot of knowledge and will be better at this business in the future, should I get into another one!


Here's my little booth. I was right proud of it. I layered quilt tops on the tables, used the wall to my best advantage, and tried to present items in inviting and interesting ways.

So what did I learn? Well, let's review...

1. Mark prices clearly. I had several quilt tops hanging from hangers and prices on tags attached to each. Well, I think folks were scared off because they saw a price that was high on an unfinished quilt. I should have written on the tag or posted a sign somewhere explaining that the price meant that I would finish the quilt for that price. I was assuming people would know, and I don't think they did.

2. Have plenty of business cards for people to take.

3. Focus my products more; I had a little bit of everything and I think folks were confused. Purses, bags, journal covers, pillows, table runners, quilt tops, t-shirt quilts and banners. That may have been too chaotic. I need to think about what I'd really like to make and sell, then focus more on that.

A good learning experience, though, and we did make some money for Dorothy's son to go on his mission trip.

Happy Quilting, Friends!

Saturday, May 17, 2014

Let's Make A Banner

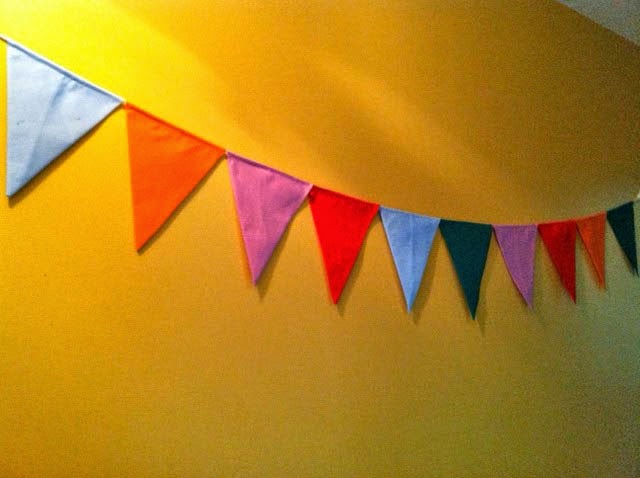
At the end of the month I will be participating in a craft fair - a first for me as a vendor. Having no experience beyond being a shopper, I have been trying to think of ways to create a booth (table) that will be appealing and inviting. Since banners are kind of "in" right now, I thought I would see how I would do with making one for my little space.


What do you think? I am satisfied with it. It's made with layer cake-sized squares, and is the easiest thing out there. Since I didn't use a layer cake, opting instead to cut squares out of solid yardage that I had, it took me a bit longer than it otherwise would have. Even still, the banner came together quite fast. I can envision attaching letters to the banner - Happy Birthday, or Merry Christmas, or since it's graduation season, Congratulations Graduate would be nice, and I could make it in the grad's school colors. I see much potential with them.

I found a tutorial on Pinterest which came from a YouTube video from Missouri Star Quilt Company - with the ever perky hostess Jenny Doan. You can click on this link to find the one I used to make this banner. If you click here, you will find the introduction to her YouTube channel - there are links to a gazillion other video tutorials that she's done. I will warn you: they are addictive! I found myself watching videos of tips and techniques that I know!! It just goes to show you that learning can happen, regardless of skill level.

If you are in the area on Saturday, May 31, you should come out to the craft fair at Greenfield Elementary School. The event is being sponsored by my friend Dorothy who is helping raise money for her son to go on a dental mission trip to Nicaragua. Scott, her son, is studying to be a dentist, and will assist with dentistry treatments to needy Nicaraguans. There will be lots to see - and buy!

Happy Quilting, Friends!