Showing posts with label flying geese. Show all posts

Thursday, May 18, 2023

Flitting

My brain just can't seem to maintain focus on anything lately. I seem to flit from project to project. One of these days perhaps I will settle on something. 

 In my defense, I had the dreaded virus last week, and while I wasn't terribly sick or miserable, I do notice that brain fog has lingered. While I quarantined - over a very busy Mother's Day weekend, which all happened without me! - In between naps, I spent a lot of time sitting around dreaming about all the projects I want to make. Very likely, this accounts for my inability to focus on a single project.

As I've most recently shared, I did continue working on Lake Effect, and feel pretty good about how far I've come on it. Click here to see my most recent efforts.

One of the new projects I've recently come up with is one made entirely of flying geese units. Here is the inspiration pic that got me all hyped up - it's from Prairie Quilt Company's Instagram account. 


The springtime freshness of these flying geese blocks just knocks my socks off. After pining for a quilt like this, I remembered a really old "someday" project stored in my quilting room. 

By gosh! Someday is finally here!!

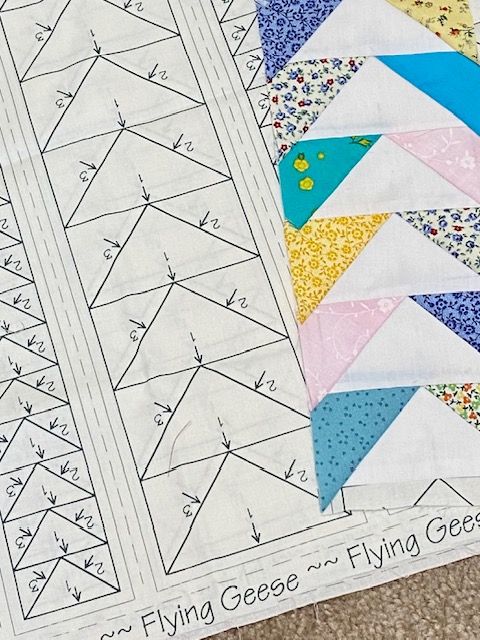
Years - years and years - ago, I bought a yard of this "Foundation By the Yard" - I suppose it was on sale. I am sure I thought I'd use it "someday." Besides this one for flying geese, I have another one for economy blocks.

Yesterday, I cut out one length and began making geese. It's been awhile since I foundation pieced, so I had a bit of relearning to do. Yes, the seam ripper joined the party, but I did eventually get a nice strip of flying geese put together.

I'm still stoked about doing this, so I will attempt another length this afternoon.

Even though this was NOWHERE near my radar of "to-do" quilts, I find that this has a couple of unexpected benefits. First, using the "someday" foundation panel. Second, the geese can be made with my 2.5-inch strips from the scrap basket. Yahoo!
Flitting from project to project isn't so bad, I guess. I always seem to have several WIPs, and more than my share of UFOs. Even so, I love to look at quilts online and dream of all those beauties just waiting to be made. 

I dare not waste a minute and get back into the swing of things around here. 

For those who wondered - DH did not get the virus. We had some exciting remodeling activity going on here at the homestead, and, yes, I was able to maintain my distance from the workers. I will share that soon.

Happy Quilting, Friends!

Tuesday, October 26, 2021

Assembly Line Piecing

One way the quilter has streamlined piecing is by employing an assembly line methods of quilt construction. Since I have begun working on the blue stars quilt, I've been looking for ways to make the units in as streamlined a way as possible.

By using the book I mentioned in the previous post, Patchwork Math by Lynn Wilder, I have my 12 blocks finished. Here are the simple steps.

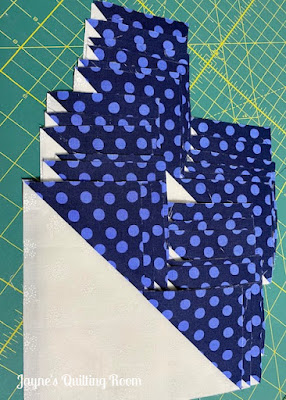
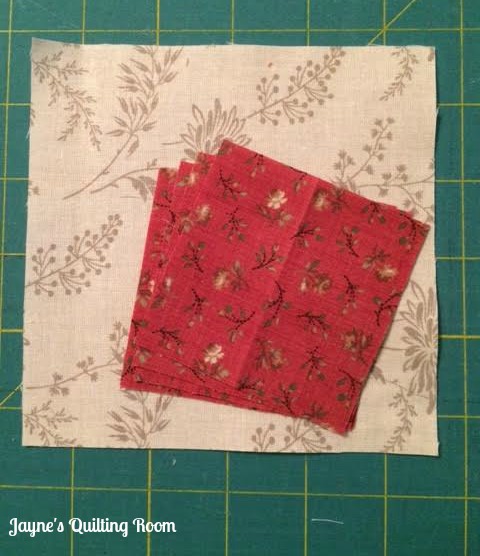
In the previous post, I shared how I finished the corner square triangle units. This post shows the process of making flying geese, the points of which will be the points of the stars. I started by referencing the section of the book for no-waste flying geese. The picture above shows the first part of the process that I photographed. The actual starting point requires a large white-on-white square and 4 smaller squares which will yield 4 flying geese, enough for one star.

After pressing the blue sections open, the remaining squares will be added.

I needed to make star points for 7 stars; the parts for those very points are all ready for the next round of stitching.

And here are the finished flying geese units, all trimmed and ready to be sewn into stars. 

Ready to be joined to those flying geese are these parts - the center squares, and the corner square triangles. Now for the assembly line. I lined up all the star parts and stitched 'em up lickety-split.

I had 5 made earlier, individually. The last seven went together easy-peasy using the book and chain piecing.

These 12 stars will need to have 13 coordinating stars, and you can bet that I will be chain piecing those as well.

Happy Quilting, Friends!


Thursday, January 19, 2017

Fast Flying Geese

By now most quilters are familiar with the fast way to make flying geese units. Even if you've never actually done it before, you at least have heard others talk about it or have seen references to it in some way, shape or form. Since several of my regular readers are non-quilters or are new to quilting, I thought I'd share the fast method, in a nutshell sort of way.


For the quilt I am currently working on, Elizabeth, I needed 24 star blocks. Each block requires 4 flying geese units. Making 96 of these little buggers can become quite tedious, and some brilliant quilter figured out a fast way of doing them that also results in NO WASTE! This is huge for quilters who know how the price of fabric has risen in the past 10 years or so. We can't afford to waste a bit of it!


Above is all the necessary fabric to make 4 complete flying geese units -- one large square for the background and 4 small squares for the points. There are formulas and charts available by searching the interwebs that give you specific sizes. Of course, my pattern directions provided me with the measurements required for this quilt.

Mark a diagonal line across the back of all the small squares.

Pin 2 squares to opposite corners. You can see how the pencil marks line up.

Sew a quarter-inch seam on both sides of the pencil line, then cut apart on the pencil line.

When those two pieces are pressed open, they look like this. Some neat-freaks might go ahead at this point and trim off those pointy bits at the corners. I didn't when I made mine, but it might be something I do next time.


Take the remaining 2 squares and pin them on the corners of the background fabric. Again, stitch a quarter-inch seam on both sides of the pencil lines.

And cut these apart the same as before - on the pencil lines.

Now you can see the finished unit! A flying geese unit!

And we have 4 of them! Get to the ironing board and (carefully) press those little guys. Trim, if desired.

 Now you are ready to build your star. You will need a star center.

And you will need 4 corners of the same background fabric as used in the flying geese.

Voila! Stitch that up like you would a 9-patch block. Fast, efficient, and no waste. I am sold on this method after doing it for this quilt. I will most definitely use it again.

I would like to give credit to the quilter who "invented" this method, but I do not know if anyone can be given that distinction. I do know where I first heard of it - years ago when Simply Quilts was on HGTV, I believe a guest (maybe Mary Ellen Hopkins?) demonstrated this. But I don't know if she is attributed with inventing it. So, if someone wants to enlighten me, I'd be happy to give credit.

Happy Quilting, Friends!

Thursday, December 13, 2012

Flying Geese Finally Finished

The stitching of the flying geese units for my star quilt are finally constructed. I have had to do them in fits and starts. The sciatic nerve and other projects prevented me from steady work on them.


I need 30 of these srars. That means 120 flying geese units. Daunting, but necessary.


So there are the flying geese, and the remaining parts necessary for finishing the stars. I will attack this next portion in the same fashion as the flying geese - fits and starts, most likely.

Happy Quilting, Friends!
 

Friday, December 7, 2012

Geese Galore

I've finally gotten back to my flying geese construction. I began them about 2 weeks ago, cut the corners off the first wing when I met with my Frankfort quilter friends, and have not touched them since.

I must confess - there is a reason. You see, my right foot is my sewing foot, and that is the side that my sciatic nerve is aggravating. And it is reeeaaallllyyyy aggravating me! I have been to a neurologist, have upcoming appointments with an MRI and a physical therapist, along with a veritable drug store of prescriptions. And I still hurt!! So, that hip, leg, ankle, foot aches even more when I ask it to press down on the foot pedal. (Don't mind if I do have some cheese with that "whine.")

So, like I said, I did get a bit of stitching done this evening. Here we have all these units in various stages of construction. I wanted to conduct a little experiment. On the stack there in front that is completed, I sewed 1/2 inch into the part that gets cut away so that I would have little, teeny-tiny half-square triangles already stitched together.


And it worked rather nicely, I do believe. I am very pleased with this little experiment. And I will definitely keep it up on the rest of those geese, and on any other geese in my future. If only I had thought of it on the first wing of all these geese. Oh well....


These HSTs will be saved and used on some as yet to be determined project. Let this be an item on my goals list for 2013.
 
Before getting upstairs to the sewing room, DH and I had dinner at the wonderful Mexican restuarant in Hillsboro, and followed that up with a trip to see Grandma. We just about always go to visit her on Friday evening. Next weekend, we will be celebrating a birthday!! Number - get this - 96!!!
 
I will be sure to get pictures.
 
Mexican food, Grandma visit, sewing some geese, and now blogging. I consider that a very satisfying Friday night. How did you spend your Friday night??
 
Happy quilting, Friends!


Wednesday, November 28, 2012

Flying Geese Units Galore!

When a quilter makes the decision to start a quilt made of stars, that usually means there will be a significant amount of time spent constructing flying geese units. For many, this is tedious work and often fraught with potential wonkiness. Dreaded work, these geese, but we forge ahead and try to make the best of it, knowing that the end justifies the means.

I recently started making a quilt that calls for 30 of these stars.


It's the cover quilt of this book by Lynette Jensen of Thimbleberries.
 
 
North bay quilts (Classic country)
 
Work is commencing on the flying geese units, too. I try to break it up into steps or stages, and don't think about the enormity of making all of those units in their entirety.


I took all of my geese to JoAnn's yesterday to cut off the triangle of the one side. Got that accomplished, and am now ready to apply the other side. Slow and steady, one step at a time, and I will get them finished off. Once this step is done, the remaining star construction is easy-peasy.
 
There are other ways out there of making flying geese. I have seen others do them and have read about them, but have not personally tried them. I can see myself doing some experimenting, though. The alternate methods do seem rather foolproof.
 
 
The age-old question of keeping or tossing those triangles that are cut away rears its head at some point during this process. Look at the great little half-square triangle that results if those ends are stitched. Wouldn't a whole pile of these work great in some yet-to-be-determined quilt??
 
I'm keeping them. (I could show you the box full of similar triangles from previous quilts.) I will sew them together. Red and white quilts are pretty special, so this is a no-brainer, isn't it?
 
My thanks for November 28:
I am thankful for a well stocked freezer and pantry.
 
Happy Quilting, Friends!
 

Wednesday, October 28, 2009

Snowflake block construction

It has been my good fortune the last couple of days to have time for working industriously on my Snowflake quilt. I need 30 blocks and have 5 totally done, and several more in progress. That might seem like a slow pace to some, but I am pleased with that progress. For me, it's remarkable, believe me!

Here are the steps of construction. First, each block needs 4 4-patch units.

Next, there are 4 flying geese units.


Finally, these units are sewn together with a 4-1/2 inch center square in 9-patch fashion.

I am trying a technique I've never tried before on those flying geese units. Customarily, I cut away both excess fabrics when a the corner square is sewn diagonally onto the 2-1/2 x4-1/2 inch rectangle. This time, though, I am just cutting away the middle layer. This leaves the full rectangle intact, and really affords me greater precision when it comes to joining the two geese together with a crisp point. I like that. Since this quilt will most likely be machine quilted, I don't think the extra layer of fabric will make much of a difference, but it makes a huge difference in the accuracy with which my blocks are coming together. Here are a few shots of the flying geese units I've just described.


It's a bit hard to see the stitching on the back of the middle photo, but while I am sewing this step, I can see exactly where I need to place the needle to get the point just right.

One of my rules MUST be to use only the fabric in my stash. I prefer using what I have except in dire circumstances. In digging through the closets, bins, tubs and drawers, I found 2 fabrics that I might use for the alternate blocks and the side and corner triangles (blocks are set on point). Here is what I've decided for now. I figure I have time to change my mind, so it's tentative, but likely, I suppose.


The paisley will be the side and corner triangles, while the other will be the alternate blocks. If I change my mind on either, it will be the dot fabric. It is from a Christmas line by Robyn Pandolph by Moda, and while I have no problem with it on it's own, I think I would like to have little navy blue dot clusters as opposed to the green ones.  Also, my neutral in the snowflake block is more gray, and the dot is a bit more beige.
 
The jury is still out. Opinions welcome.

Fabrics in the snowflake:
Navy paisley: Faye Burgos by Marcus Brothers
Neutral: Peace in the Country by Carole Endres and Benartex

Fabric for side and corner triangles:
Paisley: Butternut and Blue by Brackman and Thompson plus Culpepper Courthouse for Moda (what kind of name is that?)