Showing posts with label Chain Piecing. Show all posts

Tuesday, October 26, 2021

Assembly Line Piecing

One way the quilter has streamlined piecing is by employing an assembly line methods of quilt construction. Since I have begun working on the blue stars quilt, I've been looking for ways to make the units in as streamlined a way as possible.

By using the book I mentioned in the previous post, Patchwork Math by Lynn Wilder, I have my 12 blocks finished. Here are the simple steps.

In the previous post, I shared how I finished the corner square triangle units. This post shows the process of making flying geese, the points of which will be the points of the stars. I started by referencing the section of the book for no-waste flying geese. The picture above shows the first part of the process that I photographed. The actual starting point requires a large white-on-white square and 4 smaller squares which will yield 4 flying geese, enough for one star.
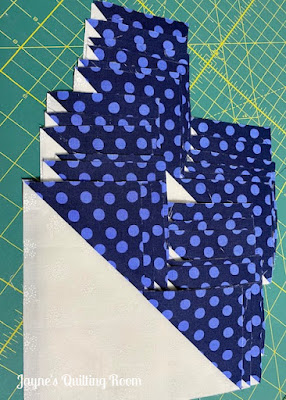
After pressing the blue sections open, the remaining squares will be added.

I needed to make star points for 7 stars; the parts for those very points are all ready for the next round of stitching.

And here are the finished flying geese units, all trimmed and ready to be sewn into stars. 

Ready to be joined to those flying geese are these parts - the center squares, and the corner square triangles. Now for the assembly line. I lined up all the star parts and stitched 'em up lickety-split.

I had 5 made earlier, individually. The last seven went together easy-peasy using the book and chain piecing.

These 12 stars will need to have 13 coordinating stars, and you can bet that I will be chain piecing those as well.

Happy Quilting, Friends!


Saturday, April 24, 2021

4-Patch Frenzy

For a couple of years now I have been making slow progress at taming the 30-year-old fabric scrap situation in the sewing room. What a task! For awhile, I will be very industrious, making great headway through the boxes, piles, tubs, and drawers. The job is so massive, and my commitment never seems to last very long. Another idea takes my focus away from scrap management; I leave the task unfinished and move on to something more exciting. Scrap management is drudgery work in comparison to a new quilt.

However, I am making progress, and having a specific quilt in mind for the scraps makes it so much easier to muster enthusiasm for the otherwise dull task.

This scrappy project has been in the works for over a year, and I have renewed focus on it since last week's quilt retreat. Those 4-patch centers have been my main focus this week.

On Tuesday and Wednesday, I was up to my eyeballs in 2-inch squares! The bin they were stored in was quite full. I wanted to turn ALL the scrappy squares into 4-patches. Whew. Seemed like I'd never finish. But finish them I did.

The pile of chain-pieced 4-patches grew and grew behind my machine.

Finally, all were made. I took the pile over to the table to cut apart and stack. How many did I make?

As I cut them apart, I stacked them in groups of 10; the grand total came to 204. That means I started with 816 squares. Geesh. Next up: pressing them open.

The quilt I am making will not require 204 more blocks. Do you see how scraps work? The situation is ongoing. With each quilt I make, I amass more scraps that potentially will be cut down into 2" squares - the cycle never ends.

Well, it could end. 

I could stop quilting. Uhhh, no. End of that conversation.

I could stop saving scraps. Again, no. Fabric is too darned expensive; I can't bear the thought of tossing out a bit that still has potential. 

Mostly, I enjoy the challenge of using scraps to make pretty quilts. However, not all scrap quilts are created equal, in my opinion. Some are way too 'busy' or chaotic-looking. More and more I find myself subscribing to the 'less is more' philosophy. In previous posts, I've used the 'controlled scrappy' description. Yes, that is what appeals most.

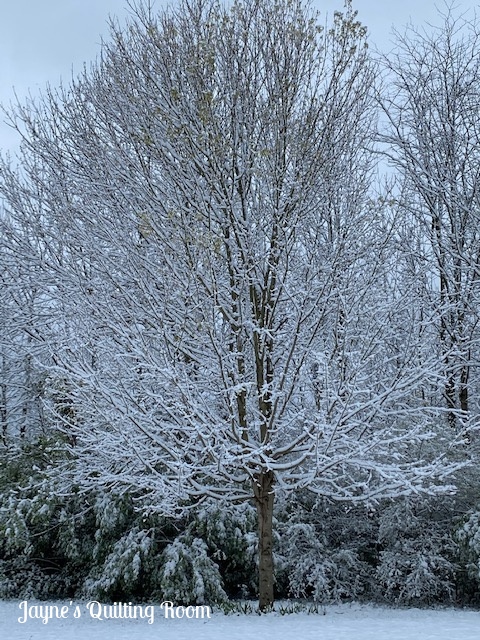
Let's change topics real quick. Did you get snow this week? On Wednesday, we had about 2". Here's the maple tree in our front yard.

Tree leaves aren't out yet, but some of the undergrowth in the background is almost fully leafed out. The snow really clung to the branches and leaves. Made a pretty picture. It was all melted by afternoon. April in Ohio - snow is not frequent, but it's certainly not the latest snow we've ever had.

Happy Saturday!


Tuesday, February 11, 2020

Sewing With Sharon

Oh Gosh! Sharon and I had a sewing day yesterday! It has been sooooo long since we have had the time to do this. We were so regular about it for so long, but life had a way of interfering this past fall, and we have been hard-pressed to see our way clear to continue.

I had 4 days of classes each week last semester; she had a chance to step up her Grandma game with her older grandson, and like I said in yesterday's post, we had to take a hiatus.

Well, all that time away meant we had a full day of catching up as well as a full day of sewing. Sharon had a Moda Love quilt all pinned together, and succeeded in her plan to stitch it into a top. The fabric is Cinnaberry by 3Sisters/Moda - a gift from someone - me! - and it looks fantastic in this super-easy quilt.


I worked on my setting blocks for Summer Nights. That mainly consisted of chain-piecing for 4-patch blocks.


By day's end, well after Sharon had gone home, I finally made a grand total of ONE block!  I intend to get a good bit of the rest done tomorrow.


Oh, it felt so good to get back into the sewing routine with Sharon. We will still have to be sporadic in our days together, but we are shooting for a day in early March to once again get together. Crossing my fingers!

Happy Quilting, Friends!

Saturday, April 16, 2016

All In A Row - A Closer Look

At the retreat a week and a half ago, I worked hard to finish the group sew-along we worked on, All In A Row by designer Kim Diehl. I thought I would show a little bit about my construction process. I talked about pulling the fabric and cutting the kit prior to going to retreat. You can click back here to review, if you like.


Going from the preparing of the fabric to this finished flimsey was quite the fun journey. I would never have made this quilt if the girls hadn't agreed to make it a group sew-along at retreat. I am ever-so-grateful that we did it. I just love my finish, and am considering hand-quilting it.

I've prepared a collage of photos that represent the major parts of the construction process. First up was to make 25 little 9-patch blocks - all with individually cut 1.5" squares. That is what you see in the upper left photo.

In the upper right photo, you can see that I have made all the HSTs for the corners and the bars for the sides of each churn dash. I lay out every single block and stack them up on top of each other. This is how I keep the parts straight, and know that all the right parts are being sewn together.

The lower left photo shows the chain piecing process. I have attached one seam top to bottom on all 25 blocks. I lay them back out beside their remaining parts, and proceed to chain piece these seams in the same way.

The lower right photo has all the parts sewn, and ready for pressing.

That is very abbreviated explanation of the way I manage chain piecing. It works for me, so I figure (if you could follow those details) it might also work for others.

Happy Quilting, Friends!