Monday, August 24, 2015

Back to Attacking a UFO

I guess I really needed to do some fun stuff and take a break from feeling like I had to work on UFOs. It was a situation where I just wasn't getting anything of significance accomplished. That Beatle Bag on Thursday/Friday and the little snappy bag on Saturday were just the diversions I needed to reboot my resolve on another UFO.

The one that niggled at me the most vociferously was the project I was supposed to finish in July - that stack of 16-patch blocks that I'd hand pieced. I knew my plan, so I drew up a sketch of it.

I have 34 of these blocks made. I am thinking that I will use 30 of them - 5 across and 6 down.

If my math is correct - and let me assure you that is a mighty big 'if' - I will be making the following components today and tomorrow.

31 of these units
18 of these units
        
The small squares here are what I will use to make the units shown above; the large squares are the cornerstones. Can you envision what it will look like? I will let you think about it for a day or two, and show you a picture once it begins coming together.

I may not have enough of this neutral fabric for all those small squares, so I might have to dig around for something 'close' enough to satisfy me. Since the main blocks are all so random, I think I will be okay with 'making do' - that's what our grandmothers would have done, right?

On top of intending to get this quilt top finished, I must read a book by Friday for book club - A God In Ruins by Kate Atkinson. Someone should hide the iPad from me so I can get all of this done! *wink*

Happy Quilting, Friends!

Saturday, August 22, 2015

Snappy Bag

Pinterest. Are you a fan? I love it, and find ga-zillions of ideas that I like. One that I recently saw sent me to the sewing machine today. It seemed so simple and fast, I just had to give it a try.

The woman who created this little bag has a blog called Gourmet Quilter; she is from New Zealand, and provides a video tutorial that walks you through the entire process of making this little bag.  You can view the video by clicking here. It couldn't be easier to follow her through the steps. The entire video is just about 15 minutes long. The only unusual component required is a metal tape measure which is cut and used to make the snap-closure. Coincidentally, I happened to have an old one put back in my craft drawer and zip-zip! I was done in no time!

This fabric will look familiar as it is what was left over from the Beatle Bag I shared in my previous post. And since my machine was still threaded with red thread, this seemed the logical fabric to use.

One variation I added was the quilting. I'd just done some quilting on the aforementioned Beatle Bag, and I thought it would be a nice accent on this little ditty. It took very little extra time at all, and I am pleased with the result.

I have an idea that this will be a little gift for someone, and it was so fast, I could easily make many more for other gifts. You really should watch that tutorial, and try it yourself!

Happy Quilting, Friends!

Friday, August 21, 2015

Finally, A Worthwhile Project

I have been moaning and groaning for the last month about the not-so-fun things I've been working on - namely that daggone HST project that I am forever 'fixing.' I finally did something totally fun and gratifying yesterday, and I think you will like it, too.


This project bag is called The Beatle Bag by Abbey Lane Quilts. It was a very easy pattern to read and follow, and the directions were simple. Only once did I think that maybe a better job could have been done, but I have enough sewing experience under my belt that I managed anyway. *wink*

I have had this bag cut out since early April. You may recall that Jan gifted each of us who attended the Canter's Cave retreat with the pattern and necessary materials for making one. We were told only to bring the fabrics, so I chose this from my stash. I think it's a Moda line, but I can't seem to find a name or designer anywhere. I have had it for at least 5 years.

But I digress...I cut out the entire bag at the retreat. And I've done nothing on it since. Jan even lent her bag to me so that I could use it as a model. Still, I never managed to get to it.

Then I revolted. I decided I needed a break from trying to complete all these UFOs. I wanted to work on something new. I needed a fresh, new project.  This would be the thing!

And I am so glad I did, too. Like I said, the construction was very simple, and I am surprised, actually, at how nice I think my little bag looks. It measures approximately 11" x 20" when fully unfolded.

Opened up, there are see-through pockets with zip-lock closures. Eight of them. There are two cloth pockets for things like rotary cutters, small rulers, or reading glasses. On the right is a long, skinny pincushion.

I loaded a few things into mine, just to show the size. I had EPP stuff strewn all over, so I corralled most of that into this bag. It seems very user friendly, so I hope I do think to use it often.

Happy Quilting, Friends!

Tuesday, August 18, 2015

Friends Who Create

Jan and JoAnn, two of the group I quilt with every other Friday morning, got together a week ago to do a project together. They sent pictures of their handiwork, but I completely forgot about sharing.

Here is a link to the pattern they used.  Jan gathered all the necessary tools and notions needed for completing the tuffet. She always seems to be giant leaps ahead - while I'm still thinking about doing one thing, she's finished ten!

Here are their finishes:

Jan's Tuffet - complete with legs

JoAnn's Tuffet -still needing legs
Clever! Very useful and can be coordinated for any decor. Great job, ladies!

Happy Quilting, Friends!

Monday, August 17, 2015

A Hasty Creation

For a long time now I have thought it would be a good idea to have a little bag with a long strap to wear across my body to carry just 3 or 4 essentials - cell phone, lip balm, reading glasses and tissues. If I don't want to carry my purse, then these are the 4 items I am always needing most. On Saturday, I had an extra 30 minutes, and I was already in the sewing room, so I just decided to create such a bag right there on the spot.

I had a small pile of leftover Snowbird fabric stacked off to the side. I charged ahead and before I knew it, this was strapped across my chest.

It looks a bit on the wonky side, but this is an optical illusion. It just needs a good pressing, and while I'm at it, I will work on those bottom corners a little more, too. I have used it, and it has come in quite handy so far. Ta-dah!


Happy Quilting, Friends!

Saturday, August 15, 2015

Hand Stitching - A Change of Pace

It seems the more I fuss with the HST project, the more I end up unsewing. So, in the interest of ignoring that particular headache, I decided to change my pace a bit with some hand stitching.

I prepped these little darlings yesterday, and since the photo was taken, have stitched one nearly complete. I still feel like a novice at this business, and have no plan for most of the ones I've completed.

Having a big day today with my Hillsboro family. Off to prepare!

Happy Quilting, Friends!

Friday, August 14, 2015

Perseids

Have you been as enthralled by the Perseid meteor showers as I have? Late Tuesday, Wednesday and Thursday nights - and into the wee hours of the following mornings - I headed out to the yard to gaze at the heavens. Nothing like looking at the vast array of stars, constellations, milky way and meteors to make a person feel the immensity of the universe. It provided ample time to be both awed and introspective.

... : Don’t miss the Perseid meteor shower | Steamboat Pilot & Today

I wasn't disappointed in my meteor viewing. All total I saw 39 meteors. There were just 8 the first night. I didn't stay out long, as I just spread an old quilt out on the ground to lay on. I was uncomfortable and cold! I wimped out after only about 20 minutes.

The second night was supposed to be the best night for viewing, according to all the reports I read or heard. DH had brought out a reclining lawn chair for me. I rounded up two quilts - one to drape across the chair and one to wrap up in - and I stayed out about 45 minutes. That night I saw 24. I was really sleepy and spent as much time with my eyes closed as I did open! Not a good way to observe meteors, is it?

Delta Aquarid Meteor Shower 2015 Live Stream: Where To Watch, How To ...

Last night I was out for over an hour and saw 17. I really wanted to stay until I saw 20, but I just couldn't stay awake any longer. I called it quits at a little past 1am. Of the 17 I saw, three were particularly impressive. They had long, vibrantly bright tails and streaked across a good portion of the sky. So perhaps Wednesday night was supposed to be the best night according to the experts, I personally thought last night was better. I kept score as I saw them - 13-3, for example. This meant I saw 13 for-sure meteors, and 3 that I thought maybe I caught a glimpse of out of the corner of my eye. I wasn't sure, though, so I kept score of the sure things as well as the maybes.  I wish I'd done this on the previous two nights, doggone it. Oh well, maybe I will remember next year. My score last night was 17-6.

... Perseids meteor shower, the Dutch astronomers’ association said on

These three pictures were all found in a yahoo search of the internet. I selected them because they most resemble the views I had from my yard.

Today, I went to Sheryll's for our Friday morning sewing. I worked yet again on ripping out parts of that darned "extra" project using the HSTs from the Snowbird Stars quilt. I don't think this much work was what I had in mind when I began stitching those triangles.

After I finished "unsewing" I worked on cutting out and pasting some EPP designs.

Pictures to follow, soon, I hope!

I had a noteworthy phone call from DD#2 yesterday afternoon. These kids really don't call anymore - they text. So getting a call meant something important. And it was. She announced that she had just finished the final two requirements for her degree. She was officially finished as an undergrad student. Whoo-hoo! You may recall that we had graduation in May - well, that was ceremonial. The real diploma will now be in hand. She had to do one class and an internship this summer. Those are both finished, and so are the written components of each - a paper and a portfolio. Whew!

Let the job offers begin!!

Happy Quilting, Friends!

Wednesday, August 12, 2015

We Interrupt Normal Programming...

If there were awards given for best procrastinator, I would sure hope someone nominates me. I think I could compete on a world class level.

If I am not traveling to fun places, or having outings with girlfriends, then I am reading. All day yesterday was spent not sewing, like I'd planned. No, I started a book, and it pulled me in hook, line and sinker. I had no chance.

At the Water's Edge 

To say I devoured it would be accurate, for certain. I didn't have much prior knowledge about this book, except that I knew I enjoyed Sara Gruen based on having read and enjoyed Water for Elephants a few years ago. This one was a bit slow to begin, but once I got settled in to the Scottish setting and had all the characters straight in my head, the story took off and it was quite an enjoyable ride. I won't say too much, as this book is coming up for our book club in a few months. Don't want to spoil it for anyone. Suffice it to say, if you are looking for a book to become totally engrossed in, then this one should be considered.

As the evening was free (I finished the book around 7pm), I headed up to the sewing room with the intent of finishing off that Snowbirds HST project. 


Then that darned procrastination bug accosted me again. Instead of sewing, I decided to deal with a couple of tumbling-over piles behind my chair that was making it increasingly difficult to move about without tripping. I threw out a great pile of old papers, sorted some notions (needles, safety pins, thimbles, ribbons, etc.) and finally, I sewed a bit and pressed a bit. I have decided that one more spot on this little table topper needs to be unsewn, which is on my agenda for today. I will also do a B-I-G project - prep a quilt with batting and backing and begin machine quilting it myself. It will be the biggest one yet for me on my little Bernina. Hope it goes well.


I will report to you tomorrow to let you know how well I accomplished by goals. 

Happy Quilting, Friends!

Monday, August 10, 2015

Unsewing

Several weeks ago - possibly bordering on months ago - I was working on a fun little project using up leftover bits from my Snowbird Stars quilt. You remember those cut-away parts from flying geese units? You can refresh your memory by clicking here. 

Anyhoo, I was immensely unhappy with how the final quarter panel looked - it was just too darned big to "ease" it all together.


Now how do I face setbacks such as this? You know me well enough by now if you said 'chuck it all aside and forget about it.' That's how I always deal with something when I discover that I've made a mistake - large or small. I guess I don't handle adversity or setbacks very well.


Since the local favorite MLB team had an afternoon game yesterday (Cleveland Indians vs. Minnesota Twins), I brought the dreaded "unsewing" job downstairs to pick apart while we watched the game. Since I ultimately needed to trim all of those HSTs, I also brought down the travel iron, little pressing board, rotary cutter and ruler so that I could go about completing the task all while the game was on.


I was trimming the last piece when the Tribe made the last out. And we won!

So, today I plan to take all the newly trimmed pieces back to the sewing machine and get this thing put together once and for all.

Later in the day, yesterday, we had some guests in our yard. We'd seen this family several times earlier this summer, but never this close to the house.


These first three pictures are the back yard, and we only saw the mama and one baby, but when we followed them around the house, guess what we saw?! Two babies!  These next three pictures are our front yard.


Have I ever mentioned that I love living here? I do; I really do.

Happy Quilting, Friends!

Sunday, August 9, 2015

Charm Pack Quilts

Once upon a time I was adamantly opposed to buying precuts. When they first came out however many years ago, I viewed precuts as just a gimmick designed to catch quilters and their hard-earned dollars.

I did a decent job of avoiding them for quite a long time, too. But somewhere along the line, I purchased one. And then another. Before long, I was buying precuts like my life depended on it. Layer Cakes. Charm Packs. Jelly Rolls. Fat Eighths.

The big problem I encountered was that I would buy them and then not use them, so I was amassing quite a precut stash. I tried a couple of projects eventually, especially when I discovered Schnibbles. I disliked wasting any part of a precut, though, and it seemed that for nearly every pattern I used there would be precut fabric in the waste basket when finished.

I set about to remedy that dilemma this week, and in the process I have made two quilt tops with some of these Charm Packs, and I didn't waste a bit. Success!

My immediate need was twofold. First, I needed a baby quilt for a soon-to-be-born baby girl. Second, I needed an easy quilt to teach for the beginning quilters who have expressed a desire for such a project.


The first quilt was the baby girl quilt. I had two Charm Packs of Lily & Will fabric by Bunny Hill Designs. I decided to make a square quilt with 64 of these 5" charm squares sewn together in random fashion. Then I would find a cream in my stash to use for a narrow inner border. Finally, I would take the remaining charm squares, cut them in half and create a piano key border.


Creating a project as you sew leads to learning a few things along the way. First, and most importantly, I learned that I would have done better with three Charm Packs rather than two. I had to resort to cutting additional 5" squares from some stash fabric that melded nicely into the colors. I used a stash white-on-white for the inner border, and I added that into the piano key borders, too.  I decided to use corner blocks for the outer border, and that made making the borders fit a much easier process that I was expecting.

Time of construction for this baby quilt, which measures at right around 50" square, was just a few hours. It was extremely satisfying to finish it so fast, and be so pleased with the results. I was pumped to make another one.

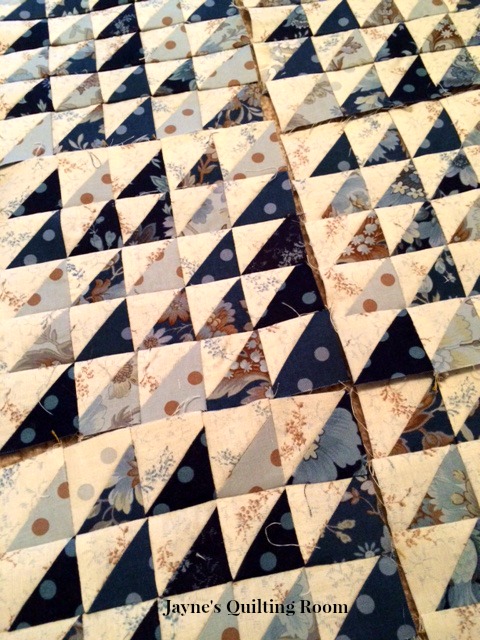
Since I want to teach this in a class for beginners, it seemed like a good idea to produce a second quilt in something other than baby quilt fabrics. People need to see the variety of possibilities, especially beginners. With that goal in mind, I returned to the Charm Pack stash and pulled out three packs - all Barbara Brackman lines: two of Civil War Jubilee and one of Civil War Homefront.

I tried streamlining a few steps, and made notes along the way to use when I teach the class. It came together just as easily as the first, and I am again loving the result. I am calling this project Triple Charm, as it requires three Charm Packs. (There will be a few leftover pieces; I will show students how to use them so they don't feel they've wasted fabric.)

Easy, right? Straight sewing; no triangles; no cutting for the center; simple inner border cut at a standard 2.5". The only complex part of this project is the outer border. Cutting all the 5" blocks into 2.5" halves, sewing together in a random fashion using an accurate quarter-inch seam will be good practice for beginning students.

Now I need to set a couple of dates, and get the word out.

Happy Quilting, Friends!

Saturday, August 8, 2015

Retail Therapy

While in Amish Country on Tuesday, Sharon, Dee and I visited Mrs. Miller's Dry Goods in Charm. I have shared this wonderful quilt shop here in earlier posts, as it has long been a favorite. It has been so long since I made random purchases, so this was quite a treat I allowed myself. *wink*

Since I seem to be teetering on that slippery slope towards the insanity known as English Paper Piecing, I picked up these two essentials--3/4" hexagon templates and glue pen refills.


Fat quarters. The blue and yellow will likely end up on a pillow for our screened porch; the red and teal set might see life as a zipper bag like the one shown here; and the brown, gray and black set seemed to be suited for EPP.

Four of these items are 1-yard cuts; I think I can never have enough neutrals in the stash, and that gray dottie one may end up going in the tub with a project I've had simmering that will use grays and yellows.  The larger piece is a 3-yard cut of white-on-white, and I have been finding myself using these more often of late, so that falls into the stash enhancement category, too.

I continue to try to use from the stash, but every now and then a gal has to shop! I think I maintained restraint and at the same time, got some real useful additions for upcoming projects.

After Charm, we drove over to Berlin where we shopped two more stores, but I was content to just window shop--no additional purchases were required, although I did see some French General that really begged to come with me. I resisted. Barely.

Happy Quilting, Friends!