Showing posts with label tutorial. Show all posts

Wednesday, May 4, 2022

Great Granny Tutorial

My method for making a Great Granny block is basically no different from many others that can be found on the internet, but I did devise a couple of stream-lining tricks that you may or may not find useful.

I  made 30 blocks for my quilt, and made each block individually. I suspect that chain-piecing could have been done to speed up the process, but I wanted each block to be different and while somewhat haphazard, when all blocks are sewn together, my quilt top would look planned and harmonious. I determined early on that my dominant colors would be pink and dark blue, so that helped with the "planned and harmonious" part.

I began with lots and lots of 2.5" squares. I had a good supply in my scrap stash, so I pulled from there as much as possible. Each Great Granny block has the same basic requirement:

        1 center square

        4 second row squares

        8 third row squares

        12 fourth row squares

        16 outer row squares

From this "recipe" I laid each block out on the cutting table like you see below.

Rather than deal with all the white outer row squares, I just kept a stack of them by the sewing machine and added them when I took this part to the machine. Taking a block from table to machine required me to create a habit that I would use time after time. I didn't want to lose my place and waste time recreating. So I learned to do it by stacking from bottom to top.
 

The two outside squares are single blocks; the next 2 in have three blocks in the stack; the next 2 have 5 blocks in the stack, and the center stack has 7 squares. The shape of these stacks resembles the shape of the top of the block in the previous picture - albeit, somewhat smooshed together and overlapped. This is so that I can easily carry them to the sewing machine.

At the machine, I added the white squares to the top and bottom of each stack, spread the stacks out in the correct order, and the two white squares in the center will be the outermost squares of the finished block.

To clarify all that mumbo-jumbo, I added numerals to indicate how many squares are in each stack. Now I am ready to sew. I begin with the two stacks of three, chain piece so I am not stopping to cut after each seam. When I have the three squares together, I add the two white squares. This prevents small, unattached parts from going missing. 

Then I begin the next two stacks - the ones marked with 5s above. I chain piece and press after every addition. The handy little iron and wool mat next to my machine makes it easy and fast.
 

I lay the finished rows out in order, and move on to the next row or rows.

All the rows are complete in the picture above. The top 4 rows have an identical row stacked under it - these will be the bottom half of the block. From this point, I work from the long middle row out to complete the block. Perhaps the picture below will illustrate what I mean. I take the single long row, which is the center row of the Gr. Granny, and add the rows to both sides.

Press! After every seam, I press. It's so much easier to do as I go rather than to do it all at the end, and it's neater this way, too.

Continue adding the next two rows, and finally that small outside unit on each side. The finished block looks like this. From here, I head back over to the cutting table and take my big square ruler to cut off the outer parts of the white squares, ideally the finished square measures 12". I admit that mine varied by as much as half an inch, but they still all went together just fine.

Below is a different block with the squaring up completed. In my squaring up efforts, I tried mostly to assure that I had a quarter-inch on each outer print square to (hopefully) maintain my points when adding the sashing strips. I  was mostly successful with this. A few points were lost, but overall, I am satisfied.

I didn't give instructions for pressing, but if you work it right, all intersections will nest just perfectly, which means you can stitch without too much pinning. That is a time saver, and as I made more blocks I became more consistent in my method of pressing. You will, too, I'm sure.

Did you notice that I have pieces some 2.5" squares? If I found I was just 1 square short of having enough to do a "round," I went digging for scraps and made a square that would work. I also have a couple of blocks in which I did "almost" matches. For example, that pink round above has one square with orange constellations, while all the others are white. Does anyone notice this in a finished quilt? 

Absolutely not!

Here's another block with "almost" matches. See if you can spot them.


I began my Great Granny quilt with the intent to use only my scraps, but as I went along, I kept enlarging the quilt, so I ended up buying a few more fabrics to fit my "look" and I am super happy with the results. I will hopefully have a completed flimsy to show you by the end of the week.

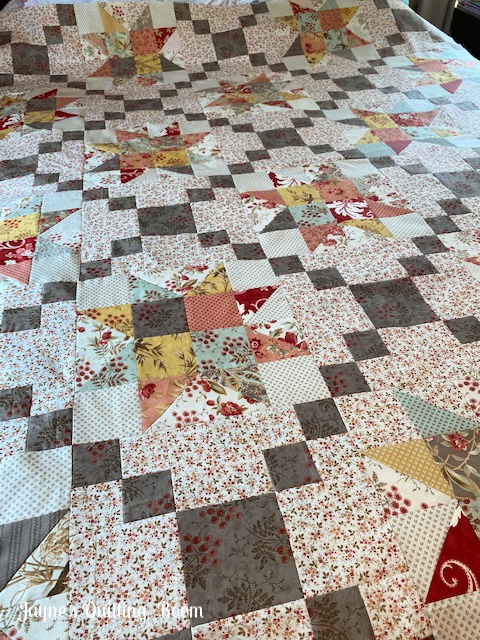
Here's the quilt laid out with the sashing strips but no border. This will have to suffice for now. Border production is in the works.

Let me know if there are any parts of this tutorial that confuses you. I'll be happy to clarify.

Happy Quilting, Friends!

Monday, July 12, 2021

Back Basting

 It has been awhile since I spoke about how to do applique with the back basting method. By no means am I an expert, but I am finding success with applique, which previously was a skill I would avoid at all costs. 

My breakthrough came in two moments which occurred almost simultaneously. First, I admired my friend Becky's beautiful applique and learned that she uses the back basting method. She explained the method, shared some tips, and encouraged me to try it. Within a day or two, almost as if destiny intervened, I chanced across a video on Instagram by the very talented Jeana Kimball, in which she provided a step-by-step tutorial on the method.

Since I am beginning the leaf appliques on one of my panels, I thought I'd go ahead and share the prepping steps. Almost any time I mention back basting, I get comments and questions about it. Hopefully this will help someone.

Prior to what you see in this photo, I have pencil-traced my entire design on the back of my panel. I have already stitched the vine/branches, which is faint but visible on the left. For leaves, I cut big shapes out of my desired fabrics and pin them over the traced leaves. It is essential to leave ample turning-under fabric, so cut larger than you need.

When you know which leaf you want to work on, move the fabric to the front of the panel. I hold my fingernail on the widest parts of the leaf to make sure I am leaving enough fabric for turning under and adjust accordingly. Pin in place.

Return to the back of the panel, and with very dark, mismatched thread, run a basting stitch on the leaf outlines. In the photo above, you can see that I have three leaves basted. This is where we get the term back basting. The next picture shows how the front looks when basted. The leaf shows because you've used that mismatched thread. Note that I am really cutting that one leaf edge close (at about the 10 o'clock point), but I think I can make it work. It will still look like a leaf if I have to come in a bit at that point, right?

Next, trim around all the shapes to remove the excess fabric. As I applique, I will trim more closely on the curves, notching or clipping as needed.


Now I am ready to stitch these three leaves. As I get some done, I will take pictures and do a follow-up on the stitching and finishing part of the process.

I sure hope this simplifies the back basting method for you. I learned it as the result of two accomplished quilters helping me along; I hope this will do the same for you!

Linking up with Kathy's Quilts in just the nick of time! Check out her weekly feature Slow Sunday Stitching!

Happy Monday! 

And Happy Quilting, Friends!


Tuesday, May 18, 2021

Tutorial - 4-Patch Scrappy Quilt

Several dear readers have reached out to me in recent days requesting information on how I made my 4-Patch Scrappy Quilt. Sure makes a quilter feel good to know people want replicate something like this. I truly just played with squares and triangles until I found a block that pleased me.

 I figured it would make sense to whip up a little tutorial for readers. If you have a significant scrap overflow, and are like me - unable to throw any of it away, then you will like this, I think.

Actually, I did a post a year ago March in which I explained how I made the block for this quilt. It is just one block, with two colorways to provide the hourglass effect where they meet.

This post and the scrap challenge described therein came just before the world shut down with the pandemic. Covid changed plans for quite a lot of folks, and while I have more or less done a lot of other things throughout this last year, I always knew I would find a way back to my Scrappy 4-Patch.

Click that link above for precise directions, or follow this summing up, if you prefer.

The inner 4-patch unit is made with 2-inch squares. All the squares in this quilt are from a bin full of 2-inch scraps that I add to all the time. Once constructed, the 4-patches should measure 3.5 inches.


The interior triangles are made with 3.25-inch squares cut once on the diagonal. One block requires 2 squares cut this way. Originally, I finger-pressed the center of the triangles and lined that crease up with the seam on the 4-patch. After awhile, though, I became dissatisfied with the way the edges were so haphazard. Even being super-careful, I think finger pressing distorted the bias. I found better results with this method: center the point of the triangle on the 4-patch. 


I generally work in batches of 8 or 10 at a time, chain piecing so I don't waste time or thread stopping and starting with every seam. I put triangles on two opposite sides, press, then add the triangles to the other sides. Press again when the batch is finished and trim to 4.75 inches. Use the marks on your ruler to assure that you are saving the necessary quarter-inch seam allowance all around.

The outer triangles are made with 4-inch squares cut once on the diagonal. Continue working in small batches applying the triangles, pressing and trimming in the same manner.


Finished, trimmed blocks should measure 6.5 inches. My quilt requires 84 blocks with red inner/white out triangles, and 84 white inner/red outer triangles, for a total of 168 blocks. Working in batches makes this seem doable. That's just my preference, however.

The "summing up" was more than a little involved. Maybe you can follow this well enough, or perhaps you'd be wise to click back to that original post mentioned above. *smiles*

Stitch those blocks together - my quilt is 12 rows wide by 14 rows long. I recommend taking the time to pin each intersection, and while not all of my points meet up properly, most do and for a scrap quilt, I am more than satisfied.

Hope this helps any of you who might want to make this quilt. Even though it took me over a year to complete the top, I am so very pleased with the effort.

Happy Quilting, Friends!


Tuesday, June 23, 2020

Star Block Tutorial

Back a few weeks ago I finished a quilt I called Larkspur Stars made with my stash of Larkspur fabrics. I did not have a pattern, and did what I seem to do more often than not - I made something up.

Go figure.

Here's the quilt, in case you missed it. And here is a link you can click back on.


I had some interest from a couple of readers about making the stars for this quilt, the sizes and so forth. This tutorial will answer those questions. (The setting blocks are pretty basic stepping stones blocks, and can be easily found in most any quilt pattern book.)

This star block measures 12"  - which means you won't have to make too many in order to have enough for a quilt, especially if you use setting blocks.

With my Larkspur stars, I wanted to be as random as could be with all the prints, both feature prints and background prints. I had one charm pack and a few fat quarters from which to make the stars. My goal was as little waste as possible - but, I try for that goal with about all my quilts, honestly.

Here is my sketch for the block. The essential numbers to remember are scribbled around the drawing.


For the solid square units, cut 4 for your center at 3.5".
Cut 4 squares of background at 3.5".


For the HSTs, cut 4 colors at 3 7/8" and 4 background at 3 7/8".

Place one color and one background right sides together , draw a diagonal line. Stitch a quarter inch on either side of the line, cut, trim, press.  These HSTs should be right at 3.5", but just in case, trim if necessary. It makes a big difference, so I take the time to do this.


At this point, I lay out my block to see how it looks. If I want more variety in my color placement, this is the time to change things out. For my demonstration star, I am using just a few purple fabrics, so I am not concerned with variety.


Now, the sub-units are prepared, and we move on to constructing the block. I typically would approach this with a chain-piecing mentality. Sew column 1 to column 2, then add column 3, then add column 4. However, I found that I more frequently ended up with sloppy intersections, so I moved to a different method which I now prefer. Make each quarter-block unit, shown below.


After pressing, I lay them out again to be sure all color placement is correct.  I now attach the two top pieces, paying very close attention to pinning my intersection where the HSTs meet. Do likewise with the bottom two pieces.


Yes, I am a pinner. I want my points to come out as near-perfect as possible. I don't always achieve this, but I am achieving it more frequently with this construction method.


I line those seams up as perfectly as possible. I check the intersections of the two HSTs. I pin on each side of the intersection to eliminate unwanted moving or slipping. Like I said, most of the time I get it right; not all. The next two pictures illustrate this point for me.
Spot on!!

Ehhh, not so much.

I left it. It might have warranted another try, but I am not too bothered. It won't be visible in the midst of a big quilt, right?


The rest is self-explanatory - sew the top half to the bottom half. Again, take care to pin where those HSTs meet. I take the time to pin the center intersection, also. I want this right! Pin!


There you have it. My Larkspur star block. As I look at these two side intersections, I am pretty happy. I got 3 of 4 pretty darn perfect. Scroll back up to the top to inspect the block using the Larkspur fabric. Those intersections look alright, too.

I hope this is helpful for you. Let me know if you have good luck with making this star. It is definitely an easy one, no doubt. I might go on from here with this block and see what I end up with. Who knows!?

Happy Quilting, Friends!

Wednesday, May 6, 2020

Hourglass Block Tutorial

In yesterday's post, I alluded to making a basic, often-used block, the hourglass. I rather rushed through the process then, but as I wrote it occurred to me that a quick tutorial might benefit some readers, specifically new or inexperienced quilters.


To make my 10.5" (unfinished) Ohio Star block, I need to make four hourglass units which will become the points of the star. That unit needs to measure 3.75" so I begin with 2 white squares and 2 blue squares which measure 4.5". Layer right sides together and draw a diagonal line on the light fabric.


Sew a scant quarter-inch away from both sides of the line. It is easy to do a lot of these at one sitting by chain piecing. The pencil line becomes the cutting line after stitching. If making lots of these, then rotary cutting is faster. Whenever I am making only a few, I will often use the grandma method - scissors.


This next step is entirely optional, but I have the habit of cutting away the "dogears" on triangles. So, take the time, if you like. It won't affect the finish either way.


Now head to the ironing board and press open. Press seam allowance to the dark, always. Be careful at this pressing stage - you don't want to stretch the bias, and you want the seam to be flat and crisp.  In the picture below, the top HST (half-square triangle) looks like I have stretched it a bit as the bottom edge and the right edge look somewhat wavy. That's an indicator that the bias stretched. The bottom HST looks pretty good.


After pressing, lay two HSTs right sides together. The seam lines should rest together nice and tight. Draw a diagonal line.


Sew on either side of the drawn line, cut apart on the line, and trim the dogears.


Press open, again being careful not to stretch the bias. This started out as a blue 4.5-inch square and a white 4.5-inch square. Now, you have 2 hourglass blocks that should measure 3.75 inches.


And that completes the hourglass tutorial. But what do you do with the hourglass block? Well, my current project calls for 90 Ohio Star blocks, which are made with hourglass sub-units. One Ohio star needs 4 of these units. Add five 3.75-inch blocks, four of background and one of the blue. Sew together in 9-patch style.


Now, what if you changed that center square? How would that change the look of the block? I love to experiment, so let's see what we can come up with.


I laid a yellow block over the center just to get an idea of how a 3-color star would look. I seriously considered making my blocks this way, but ultimately preferred to keep each block simpler with 2 colors.

It is possible to get more creative with fabric placement using three colors. Here's what I will start with for the hourglass units.


Determining that I want my star points to be red, I use 2 red squares, one background square and one accent square.

I sew one red to the background and the other red to the accent. Trim and place one of each combination together to make the hourglass unit.


I now have a red star on a gray background with a gold accent in the center.

Adding a fourth color gives me yet another variation. Check out this star with a navy center.


I could go on and on changing out fabrics. Think of how a beautiful floral in the center would change things. Or a variety of prints for each part. The possibilities are endless.

One more thing I will show you: what you have when you don't trim the dogears. It is no big deal, but the longer I quilt, the more I clean up little things like this.


Take some time to play around with all the possibilities. If you are worried about sizing, do it the way I did. Begin with a set measurement for your squares to make the hourglass units. I just randomly chose to start with 4.5 inches. I could just as easily have use 2.5 inches  or 3 inches for a smaller star. Or I could have use a larger square for a larger star. I made the hourglass block, measured it, and that became the size I knew I needed to cut for my remaining block parts.

Please let me know if you try making hourglass blocks with this tutorial. If you have trouble, I will gladly revise any parts that are confusing.

Happy Quilting, Friends!