Showing posts with label 4-patch scrappy. Show all posts

Monday, January 31, 2022

4-Patch Delight

Here we are ending January, and even with all the travel time, I am sharing a finish for the month. And - bonus - it fits the last and very loosely defined goal on my '22 Goals List - "Numerous TBA Quilts." In this post I delve into many possibilities for gorgeous yet simple quilts that would fulfill this particular goal, and share appealing inspiration pics from my Pinterest boards.
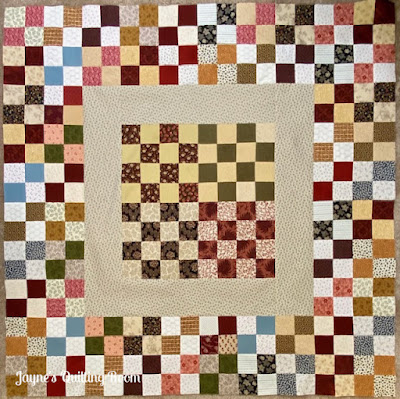

Simple. Straightforward. Easy. Fast. Satisfying. Stash-busting.

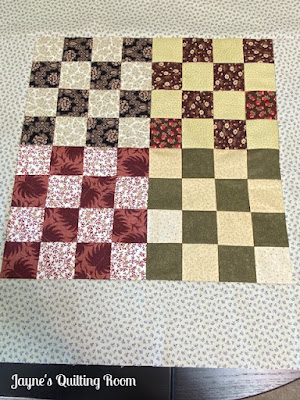
Yes, this little cutie ticks all the boxes. I had the 2.5-inch squares prepared and on hand. I took my time enjoying the process of matching up light and dark combinations. The fact that I made enough for this quilt was a pleasant surprise - I guessed pretty accurately - only 2 4-patches left over.

I was winging it, for sure, and it just all worked out as if it were meant to be. Here are the most basic instructions; while I used 2.5-inch squares, this, of course, one could work with whatever size happens to be on hand.
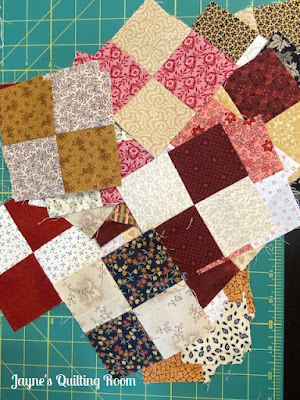
1. Make a whole bunch of 4-patch blocks.

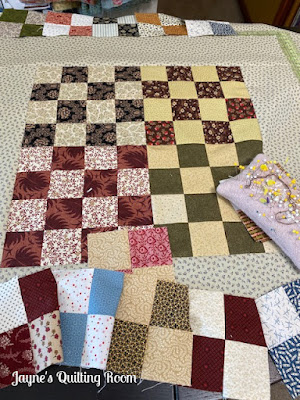
2. Attach 4-patches to make  4 16-patch units.

3. Attach 16-patches, then add inner border.


4. Attach two rows of 4-patches to the top and bottom.
5. Add two rows of 4-patches to the sides.

DONE! This measures 42.5 inches, and at present I intend to leave it as is. The possibility of adding to it appeals to me, but not as much as considering this particular piece FINISHED. I can use it as a table cloth, or drape it on the back of a chair. 

I don't mind square quilts, but if I were to make another one just to see what it would look like in a larger size, I believe I would play around with ways to make it rectangular for use on a bed. Six center blocks? That seems a likely place to begin.
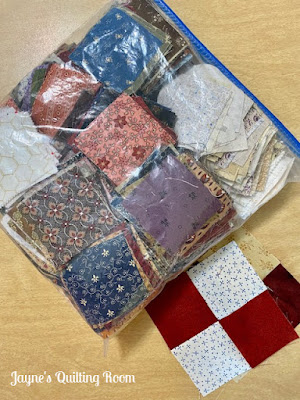

And look - the bag is still full. I've barely touched the contents. The oft-heard cry from quilters about never running out of scraps is true! The more we use, the more the scrap bins/bags/baskets overflow.

I hope you are having a wonderful Monday. I need to take care of lots of loose ends today, chief among them - a massive grocery haul. 

Happy Quilting, Friends!



Tuesday, May 18, 2021

Tutorial - 4-Patch Scrappy Quilt

Several dear readers have reached out to me in recent days requesting information on how I made my 4-Patch Scrappy Quilt. Sure makes a quilter feel good to know people want replicate something like this. I truly just played with squares and triangles until I found a block that pleased me.

 I figured it would make sense to whip up a little tutorial for readers. If you have a significant scrap overflow, and are like me - unable to throw any of it away, then you will like this, I think.

Actually, I did a post a year ago March in which I explained how I made the block for this quilt. It is just one block, with two colorways to provide the hourglass effect where they meet.

This post and the scrap challenge described therein came just before the world shut down with the pandemic. Covid changed plans for quite a lot of folks, and while I have more or less done a lot of other things throughout this last year, I always knew I would find a way back to my Scrappy 4-Patch.

Click that link above for precise directions, or follow this summing up, if you prefer.

The inner 4-patch unit is made with 2-inch squares. All the squares in this quilt are from a bin full of 2-inch scraps that I add to all the time. Once constructed, the 4-patches should measure 3.5 inches.


The interior triangles are made with 3.25-inch squares cut once on the diagonal. One block requires 2 squares cut this way. Originally, I finger-pressed the center of the triangles and lined that crease up with the seam on the 4-patch. After awhile, though, I became dissatisfied with the way the edges were so haphazard. Even being super-careful, I think finger pressing distorted the bias. I found better results with this method: center the point of the triangle on the 4-patch. 


I generally work in batches of 8 or 10 at a time, chain piecing so I don't waste time or thread stopping and starting with every seam. I put triangles on two opposite sides, press, then add the triangles to the other sides. Press again when the batch is finished and trim to 4.75 inches. Use the marks on your ruler to assure that you are saving the necessary quarter-inch seam allowance all around.

The outer triangles are made with 4-inch squares cut once on the diagonal. Continue working in small batches applying the triangles, pressing and trimming in the same manner.


Finished, trimmed blocks should measure 6.5 inches. My quilt requires 84 blocks with red inner/white out triangles, and 84 white inner/red outer triangles, for a total of 168 blocks. Working in batches makes this seem doable. That's just my preference, however.

The "summing up" was more than a little involved. Maybe you can follow this well enough, or perhaps you'd be wise to click back to that original post mentioned above. *smiles*

Stitch those blocks together - my quilt is 12 rows wide by 14 rows long. I recommend taking the time to pin each intersection, and while not all of my points meet up properly, most do and for a scrap quilt, I am more than satisfied.

Hope this helps any of you who might want to make this quilt. Even though it took me over a year to complete the top, I am so very pleased with the effort.

Happy Quilting, Friends!


Saturday, May 15, 2021

Local Art Show

Concerned citizens of our little town are trying their darnedest to revitalize a decaying historic downtown. Determined to save old buildings and attract new business,  new life is slowly returning to this formerly bustling town. 3G hosts several events throughout the year to boost Greenfield's comeback.

Tonight the 3G organization is sponsoring a Wine Walk and Art Show. Sounds like a good time, right? I have entered three little quilts as "art" - yes, I think they qualify. I wanted to show you what I've entered, and while we walk this evening (and sip our wine), I will take some photos and share those later.

 All three of these little gems have been hanging on various walls in the sewing area. I've described them in previous posts, but this post will provide a little recap.

Tossing a few little quilts around on the kitchen table makes for a festive look. I did a whole post on some of my little creations awhile back. Click to revisit here.

Pink Lemonade

Scrappy Stars (it's real name is Pincushion Stars)

4-Patch Scrappy

All were machine pieced and machine quilted. I would venture to say that all were made on more of a whim than on any specific plan or goal. All were made from existing stash fabrics, often scraps that were just left out on the table from the last thing I made. Don't judge! *grin*

When I filled out the paperwork to enter these little quilts in the 3G event, there was a space on the form for indicating if the pieces were for sale. I considered this momentarily, but I don't think so. While I wouldn't mind making money on my quilts, I really like these three little creations. I wouldn't even know what kind of price to put on them, actually.

Scrappy Stars, aka Pincushion Stars, is especially dear. If you read this post, you will see that it provided me my one big claim to fame at that 2016 Ross County Fair. 

Click on the links under each individual quilt to read odd bits and details on when/how the quilts were constructed. 

That's all for today, Peeps! Come on back to see pics of the Wine Walk and Art Show!

Happy Quilting, Friends!


Thursday, May 13, 2021

A Scrappy Finish

After the busy stuff of last week preparing to host two different "events," I find myself this week with tons of free time for sewing. 

Yay!


It helps when I have a good audiobook, too. This week I have been sewing in the court of the York King Edward IV, at the beginning of the War of the Roses. His sons were the famous "lost princes in the tower." What fascinating, yet tragic history. The book is The White Queen by Philippa Gregory, and the story is told from his wife's point of view. Elizabeth Woodville saw much tragedy in her life.

from Goodreads.com
 

All that listening has provided me time for finishing my long-term WIP, the 4-patch scrappy quilt top. Over a year ago I was gung-ho on this quilt, and worked furiously to make these blocks and stitch them into a quilt top. I didn't have a pattern, and had no ideas sketched out for how many I would need, but I felt confident that 80 blocks would be plenty.

Ahem.

Thirty-five blocks cover about a quarter of the bed.


If I wanted a bed quilt, eighty blocks would not be nearly enough! Why, I needed at least 80 more!  Goodness gracious; that really demoralized me. So I put it aside and worked on other things. A whole year's worth of other things, actually. (Have you seen previous examples of my skill with avoidance??)

Blocks made at quilt retreat.

As I prepared for the Quilt Retreat last month, this came out of its year-long 'time out,' and ever since, I have been steadily whittling away on the additional blocks, and finally, this week have completing a full quilt top.

I call my scrappy quilt an example of "controlled scrappy." The 4-patches are 100% from my scrap baskets. I pretty much pieced them as randomly as possible. The shirtings (white) are not necessarily scraps, although some are. I used fat quarters from my stash and tried to keep them all as consistent in their coloration as possible. The red started out as scrap red and was intended to be consistently one particular fabric. But I needed a lot and I forbid myself from buying more, so I searched the stash for a suitable matching red. As I look at this quilt on the bed, I have a hard time finding differences, although they are quite evident, if one studies it.

I had a helper when I laid the quilt top out on the bed; Rocky is here for a visit.

Now I am pondering whether to add borders or not. I suppose what I will do is check the stash for ample reds that would suit. If I don't find anything, I will just leave it borderless. I am ready to move on to the next quilt!

Happy Quilting, Friends!


Tuesday, May 4, 2021

Starting Again

It seems my case is hopeless. Some quilters have the ability to finish one thing before starting another, but I am not one of them. 


I'm sorta' happy about it, too.

Some of my most enjoyable moments in the entire quilting process come when I am starting a new quilt. Finishes do feel good, don't get me wrong. Taking the last stitch in the quilt top or the quilting or the binding - all those rank right up there on the satisfaction meter. Honestly, though, I believe starting something new beats them all.

I mentioned in this post that I was super-inspired by Sheryll's Ohio Star quilt when we had show and tell last Friday morning. That quilt stayed on my mind all weekend! So, yesterday, I finished up some partial blocks for my 4-patch scrappy quilt, then rewarded myself by allowing ONE block. 


Just a test block, you know. To be sure of the size of my cuts and all that. Yes. 

I've made no more, but I have parts for 3 more cut out. *smile* I tell myself that these can only be made once work has been completed on current WIPs.

And speaking of current WIPs - the Scrappy 4-Patch is coming right along. I have gazillions of 4-patches made, pressed and trimmed. Several had the first round of corner triangles added, and now the final round has been added on these.

As it is a scrappy quilt, I am allowing the 4-patches to be as wild and random as can be. For example, that one on top has a Kaffe Fasset scrap, a shirting scrap, a juvenile scrap, and a calico floral scrap. Quite the mish-mash. The surrounding red is consistent, to give order to the madness. The shirtings are all varied, too. As the quilt comes together, the red seems to do well enough in preventing too much chaotic.

Stitching this week might have to take a back seat to housework. I am hosting the card group on Thursday, and family is coming on Sunday. Not only must I tidy up around here, I have food prep, also! Heavens! Do I remember how???

Happy Quilting, Friends!