Showing posts with label Jelly Roll Race Quilt. Show all posts

Saturday, September 17, 2022

Jelly Roll Day


To honor the creative genius that is THE Jellyroll, and since I won't be working on a JR quilt this time around, I will share some of my previous creations made with jelly rolls.

Jelly Roll 2019 - French General fabrics
https://blogger.googleusercontent.com/img/b/R29vZ2xl/AVvXsEjtlqnRgjlnP7Vl7U0jITPieRez6ZDZEi98n5o7GSSwiMeLFbs34Rt8kamcFF6qfNrR6I-xbqRKjSyO3rCjKtlfrl3KFp0aHgzALfkvAh844ZoTEBtfl2r_HIxKDUzQI5KKfzkpeP0kp3g/s1600/Jelly+Roll+Fix+and+Finish.jpg
Jelly Roll 2017-18 - French General fabrics

Jelly Roll 2021 = Roman Holiday fabric

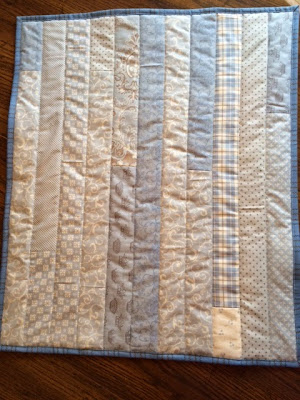
1/2 Jelly Roll 2015 - baby quilt

Jelly Roll 2015 - gifted

I still have several Jelly Rolls in the stash upstairs, but I will hold off on getting a JR quilt started for now. If inspiration strikes, though, you know I can do a sharp about-face with little notice. 

Have a great Saturday!

Happy Quilting, Friends!


Wednesday, May 2, 2018

Jelly Roll Confessions

Back in September, the folks at Moda celebrated their wildly successful little brainchild knows as the Jelly Roll. The event was called National Sew a Jelly Roll Day. I think there might have been some international activities, too.


Anyway, Sharon and I were not able to join any official events on that particular day, but we did want to devote a day to Jelly Roll sewing, and did that in a few days after the official day. You can read my post to get more details. It wasn't until November of last year that I could finally bring myself to mention the total disaster my Jelly Roll effort had been, and I did it in a post about Sharon's beautiful blue work - her JR quilt was made with the blues and greens of Kaffe Fassett.


We had both made the basic jelly roll quilt several times, so we went searching Pinterest to find a jelly roll quilt that would offer something different. We decided on one, and if you use Sharon's quilt, above, as a guide, you see a very simple quilt made from a single jelly roll. We liked the way a border is established with the vertical rows. Even the most beginning level novice could make this quilt with little trouble. I, however, managed to make such a giant mess of this that I stuffed it away for almost 6 months in shame and disgust.

The obvious thing to do would be to sewing the center section first, and trim it when finished before adding the vertical portions. Sharon did that. I did not. I began sewing from the outer border and worked my way in. Duh. I mean DUH! How dumb an idea was that? What was I thinking?


I should have taken better before pics, but this one will adequately demonstrate what happened. I was in the process of fixing it when I took the photo above. The pink arrow in the upper left corner is showing that the border is hanging over the edge of the table. It is nice and straight - even with the table's edge. That blue arrow is pointing to a seam that is slicing vertically on the opposite side. I think this might be a lesson in knowing what will happen if one sews in one direction, cross-grain. After 40 or so are added on, the strips are stretched and stretched and stretched. Every quilter knows to turn those around and sew the other direction to prevent this from happening. I did it anyway. Geesh.

Here's how I dealt with the problem, as best as I can describe it. From the edge with the order (pink arrow), I measured over a certain number of inches top to bottom and marked a cutting line. I removed the uneven part, which sounds funny because what remained was uneven, too.


Then I set that aside while I unwrapped a brand new jelly roll. Yes, I bought a new jelly roll in order to fix the mistake. Thank goodness for Etsy shops! This is French General's Madame Rouge. I carefully cut 12 inches off each strip to add to my center section. Then I sewed them together in matching order.


You better believe that I sewed one direction and then the opposite on every one of these replacement strips. That strip was perfectly straight and even, thankfully.


So then I pinned each intersection and stitched the new with the old. Then I added the vertical strips and the outer border. Whew! It is a far cry from perfect, but it's acceptable, and once it is quilted I dare anyone to find fault with it.


So ends the saga of the ridiculously easy quilt that I made into a nightmare. This is what happens when we get just a bit too big for our britches and think we can just sew without thinking and planning. Maybe some sewists can do it; this humbling effort proves that I cannot.

All's well that ends well, though, right??

Happy Quilting, Friends!

Sunday, April 22, 2018

Finishes!

Our recent quilt retreat proved to be quite productive in that I finished three projects - all WIPs or UFOs. Having these things "nagging" me over the past few weeks and months had become rather a burden, and it feels like a weight has been removed by having them done - to the flimsy stage, at least.

First, I concentrated on the final steps of the Star and Chain quilt - the Thimbleberries project which was left over from last year's retreat. The blocks were all completed, and through the early part of this month I had been working on sashing strips. Basically, all I needed to do at retreat was to stitch the rows together. That required a lot of pinning and pressing, but the resulting quilt is so worth it.


Next on my to-do list was to add borders to my swap quilt - actually, a mini-quilt. Six of us in the Frankfort Girls group exchanged blocks and made the arbitrary goal of having the mini-quilts together for retreat. I needed to add my borders. So here is that quick job completed.


I probably will hand quilt this mini using a Baptist Fan motif with big-stitches. This style of quilting appeals to me as does the muted, low-volume look of this quilt; I am glad to have a chance to see it all coming together.

My third finish of the retreat involved facing a repair job - fixing my Jelly Roll fiasco from last September. I made such a mess of that seemingly easy quilt, that I just stuffed it away for 6+ months in aggravation. It definitely had been the biggest "nagging" quilt of the three, so I did the best I could with it - the old make lemonade out of lemons theory - and I think this finish will be just fine. Should anyone study the construction, they will surely wonder why there's an odd seam going down the length of the quilt. Once it's quilted, though, I suspect it will be nearly invisible.


In a few days, I plan to share the ugly truths about the errors I made with this easy quilt. I need to get my thoughts sorted out, first, and figure out how to explain it simply. Honestly, I am not really sure what all I did wrong at this point.

So those are my finishes. Right proud of this, for sure - I gleefully checked them off my list. Gives me a "clean slate" sort of feeling.

Happy Quilting, Friends!


Friday, February 12, 2016

Quick UFO

Keeping UFOs around my workspace, cluttering things, moving from here to there and back and so on...this is my MO. So yesterday I went to the sewing room with the intention of clearing off and finishing one UFO.

I am happy to report that I accomplished that goal. And, just as I knew it would be, the finish was totally easy and fast. There simply is no explanation why I didn't get right on it from the get-go.

Back in November, after I'd finished the Mondo bag, I was left with half a jelly roll of a Moda fabric called Neptune. Since Sharon was here and was working on a 'race quilt,' I decided to just go ahead and do that with the remaining jelly roll. You can click here to read the post I did about it.

So, on the back of my sewing table I have had this long, skinny borderless quilt top folded there since mid-November. Beside it I'd place the charm pack of Neptune fabrics that I intended to use for the border. Yesterday, I completed that ridiculously easy UFO.

I only added borders to the sides. Because I wanted to correct the narrowness of this quilt top, adding 9.5 inches (4.75 on each side), makes it more regularly shaped. It will work nicely as a lap quilt.


Feels good to have a finish on this. Easy as it was, I just shake my head at my lack of initiative in finishing it. Gracious.

While working on that, I gave serious thought to what I will work on next and I have a plan.

I HAVE A PLAN!!

Something new!! I am going forward with one of those Thimbleberries quilts I showed you a few posts back - Goldenrod Patch. Pictures of  that forthcoming.

Happy Quilting, Friends!