
Three days of sewing with friends - how lucky can I get??
Yesterday, the party came to me.
My good friend Vickie, a non-quilter, and her daughter, Erin, a quilter-in-training, came over for some assistance. Erin is in "nesting" mode, preparing for the arrival of a baby girl in July! On her own, she has made curtains for the nursery, fitted crib sheets, and more - I want to say a crib skirt, but I'm not sure. Anyway, she has a great start, and the pictures she showed me look fantastic.
Even with these sewing successes under her belt, Erin felt she needed instruction in some of the basics of cutting, squaring up fabric, and minimizing waste. All noble goals, wouldn't you say? So we went to work.
The quilt Erin wants to make is called a Puff Quilt; another name is Biscuit Quilt. I did a Google search for an image, and found this one.

Erin had a website that we looked at, and there was a tutorial, so I think if you want to make one, finding instructions should be easy.
As a novice quilter, Erin has not amassed the tools to make the process easier and faster. By having an opportunity to use a variety of mine, she now knows the things that will be most useful, should she decide that she wants to pursue this quilting stuff more seriously. We had a brief lesson on rotary cutting; she brought her fat quarters, I cut one or two into 6-inch squares, offering tips as I did, then handed off the rotary cutter to her.

She was a fast learner! In no time she had mastered that cutting business, and was cranking out 6-inch squares just as fast and accurately as you please. She even felt confident enough to give her mother a little tutorial. I do believe Vickie liked the feel of that cutter in her hand!

Our session this afternoon yielded 96 6-inch blocks and 96 4.5-inch blocks, with a few extra for good measure. We used a couple of those extras to practice on making the puffs.

I stitched this puff, and Erin stuffed it. The way it will be made, though, doesn't have the stuffing going in at this point. All the squares will be sewn together and then the stuffing will be inserted.
Erin sat at the machine and stitched one next. Below is what the puff looks like without the stuffing. Basically, the 6-inch square is positioned on the 4.5-inch square, a pleat is formed in the center of each side, and it is stitched all the way around. When all 96 of these are made, they will be connected, and then a slit will be made in the back of each square, the stuffing will be inserted, and then whip-stitched closed. Then a backing is attached to the quilt, and Voila!! A fun quilt is ready for baby!

Erin layed all the squares out on the floor in the pattern she selected. Looks very baby-friendly, doesn't it?

Erin is here visiting her parents for the remainder of the week. (She lives out of state.) I think she intends to work on this while her mother is at work. If she runs into any difficulty, I am just an instant message or text message away!
While Erin worked on her baby quilt, I was able to get all but one diagonal line attached to my Erin's Diamond quilt. I will have that finish for you here tomorrow or Friday. Yaaayy!!
Two Erins - yes, it's confusing. And they played together when they were little.We used the phrases "My Erin" and "Your Erin" to distinguish.
Happy Quilting, Friends!

Yesterday, the party came to me.
My good friend Vickie, a non-quilter, and her daughter, Erin, a quilter-in-training, came over for some assistance. Erin is in "nesting" mode, preparing for the arrival of a baby girl in July! On her own, she has made curtains for the nursery, fitted crib sheets, and more - I want to say a crib skirt, but I'm not sure. Anyway, she has a great start, and the pictures she showed me look fantastic.
Even with these sewing successes under her belt, Erin felt she needed instruction in some of the basics of cutting, squaring up fabric, and minimizing waste. All noble goals, wouldn't you say? So we went to work.
The quilt Erin wants to make is called a Puff Quilt; another name is Biscuit Quilt. I did a Google search for an image, and found this one.

Erin had a website that we looked at, and there was a tutorial, so I think if you want to make one, finding instructions should be easy.
As a novice quilter, Erin has not amassed the tools to make the process easier and faster. By having an opportunity to use a variety of mine, she now knows the things that will be most useful, should she decide that she wants to pursue this quilting stuff more seriously. We had a brief lesson on rotary cutting; she brought her fat quarters, I cut one or two into 6-inch squares, offering tips as I did, then handed off the rotary cutter to her.
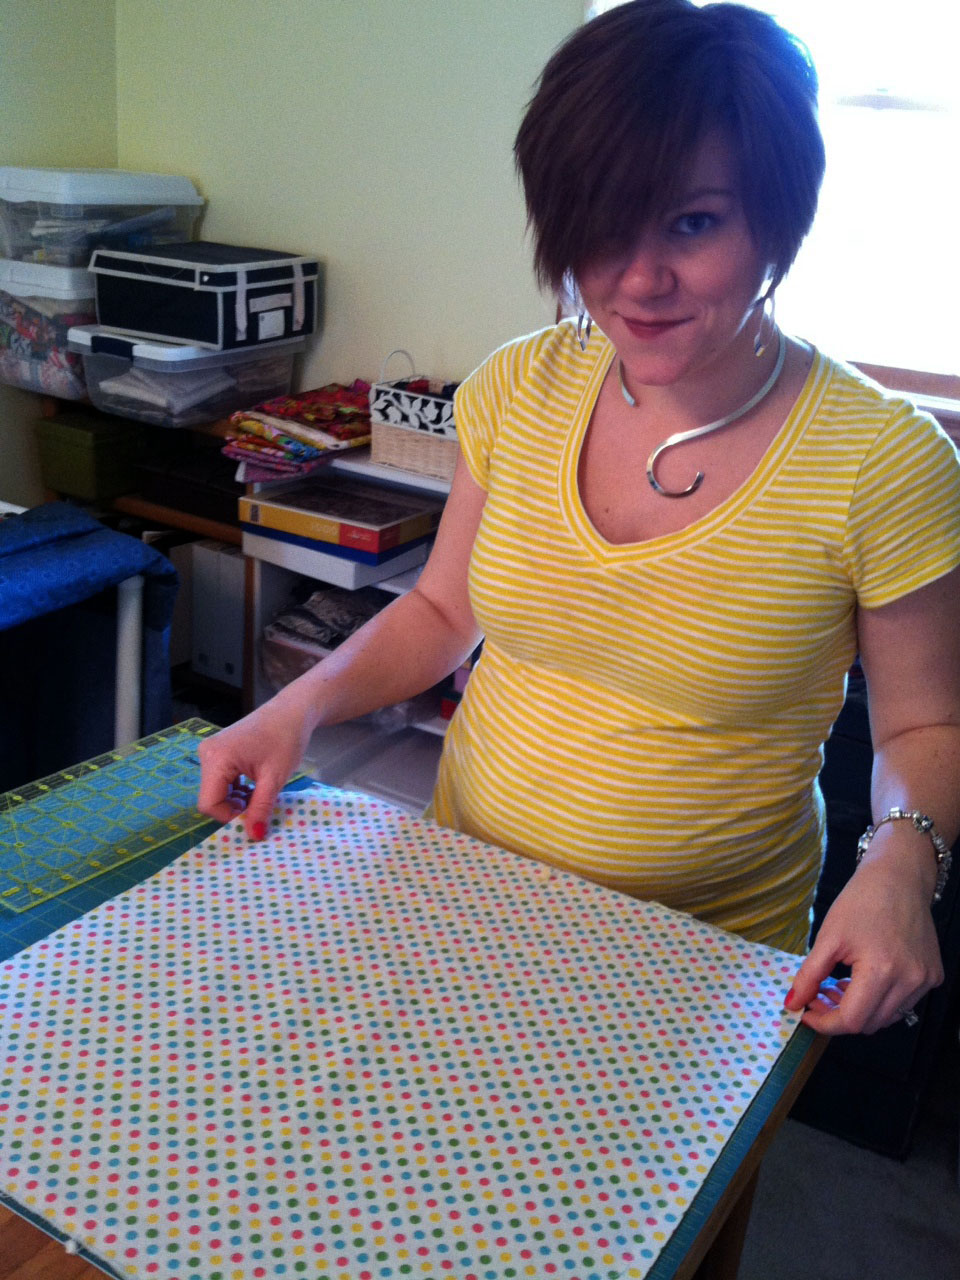
She was a fast learner! In no time she had mastered that cutting business, and was cranking out 6-inch squares just as fast and accurately as you please. She even felt confident enough to give her mother a little tutorial. I do believe Vickie liked the feel of that cutter in her hand!

Our session this afternoon yielded 96 6-inch blocks and 96 4.5-inch blocks, with a few extra for good measure. We used a couple of those extras to practice on making the puffs.

I stitched this puff, and Erin stuffed it. The way it will be made, though, doesn't have the stuffing going in at this point. All the squares will be sewn together and then the stuffing will be inserted.
Erin sat at the machine and stitched one next. Below is what the puff looks like without the stuffing. Basically, the 6-inch square is positioned on the 4.5-inch square, a pleat is formed in the center of each side, and it is stitched all the way around. When all 96 of these are made, they will be connected, and then a slit will be made in the back of each square, the stuffing will be inserted, and then whip-stitched closed. Then a backing is attached to the quilt, and Voila!! A fun quilt is ready for baby!

Erin layed all the squares out on the floor in the pattern she selected. Looks very baby-friendly, doesn't it?

While Erin worked on her baby quilt, I was able to get all but one diagonal line attached to my Erin's Diamond quilt. I will have that finish for you here tomorrow or Friday. Yaaayy!!
Two Erins - yes, it's confusing. And they played together when they were little.We used the phrases "My Erin" and "Your Erin" to distinguish.
Happy Quilting, Friends!

So nice to see the young girls get excited about sewing and quilting. Thank you for the mini tutorial on Biscuit quilts, I never knew how it was done.
ReplyDeleteI think you've hooked Erin! My husband is Leigh and we have a female friend Lee so we have boy Leigh and girl Lee in our house!
ReplyDelete